Whether you’re a beginner keyboard player or experienced pianist, there are tons of ways to get better.
One thing that lots of pianists lack is an exercise routine.
Exercises can significantly improve your technique and your chops.
Some questions you might ask are, “Which exercises are the best?” or “How often should I do them?”
This article covers a few of the best piano exercises that all pianists can do to step up their game.
Quick NavigationPiano Exercises For BeginnersExercise 1: Rising and Falling FingersExercise 2: Scales, But With a TwistExercise 3: ImprovisationExercise 4: Sight-ReadingPiano Exercises to ImproveExercise 1: Running Through The ChordsExercise 2: ArpeggiosExercise 3: Chromatic ScaleExercise 4: Play a Song You KnowExercise 5: The Pentatonic ScaleTop 5 Piano Exercises for BeginnersConclusion
Piano Exercises For Beginners

Piano exercises are essential for starting-out pianists. It’s challenging to increase your finger dexterity just by learning songs. You’ll find that the more time you spend on exercises, the faster you’ll be able to learn those songs.
Exercise 1: Rising and Falling Fingers
This first exercise is for all pianists, beginner, or advanced. It takes place entirely on the white keys. Both hands play the same thing, so the fingering is different for each hand.
You start it by putting all 5 fingers on the first 5 notes of the C major scale. On your left hand, your pinky should be on C, and your thumb should be on it with your right hand. Now, keep the C’s in place and move the rest of your fingers up a white key. There should now be a gap between your thumb and the other 4 fingers. Your hands will stay in this exact position and move across the keyboard.
With both hands, play these notes in the following order: C, E, F, G, A, G, F, E. Don’t play the C again. Instead, put your thumb and pinky on D. Now, the order of the next set of notes is this: D, F, G, A, B, A, G, F. Now, you can see the pattern.
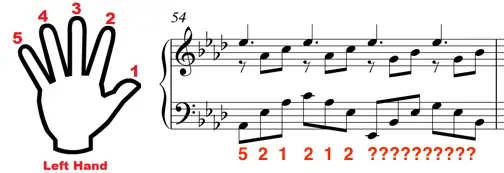
Continue going up until you reach the point where you started. Now, you go back down. While you were going up, the exercise targeted the 4th and 5th fingers of your left hand. Going back down, it targets the 4th and 5th fingers of the right hand. Play these notes in the following order: C, A, G, F, E, F, G, A. After the A, your pinky and thumb will land on B and repeat the pattern.
This exercise targets the infamous 4th and 5th fingers of both hands. These fingers are the hardest to control, so it’s crucial to improve their dexterity. When you try and move just your pointer and 3rd finger, you’ll notice that your ring finger naturally wants to move as well. For that reason, it’s hard to pair it with the pinky without exercises like this.
Exercise 2: Scales, But With a Twist
Let’s face it, we can’t escape scales. They aren’t the most fun thing to practice, but they will take your piano playing to the next level. However, they don’t need to be boring. Try playing them in different rhythms. Not only is it more fun, but it’s also a good rhythmic exercise. Here are some of the different rhythms you can use when playing scales:
- Swing the notes(long-short)
- Triplets
- Short-long
Make sure to use the right fingering when you play scales. Otherwise, it will be much harder than it needs to be. Once you get more fluent at it, there’s another excellent way to practice them.
Contrary Motion Scales
This method isn’t as difficult as it sounds. If you practice it, you’ll be able to play major scales in your sleep. Put your right-hand thumb and left-hand pinky on C in a low register an octave apart. Now, play up the C major scale up for 2 octaves. Once you get there, your right-hand keeps going up, but your left-hand goes back down. So, both your hands are now moving away from each other. Play another 2 octaves in this contrary motion, and then bring them back together. Once your hands get back to where they separated, go back down to where you started with both of them.
Exercise 3: Improvisation
Sometimes, regular scales and exercises don’t do the trick of warming you up. Improv is a solid alternative. While conventional exercises can help build your speed and technique, improv builds your creativity.
Start with a chord or play a simple progression. Once you’ve played through it a few times, start experimenting with things like rhythm, style, inversions, arpeggios, etc. This exercise is the perfect opportunity to incorporate some of the skills you acquired from normal exercises.
If you don’t know any progressions yet, there’s an improv exercise that might suit you better. Start out by playing a chord of your choice. You’ll be staying on this chord, so you can use more of the sustain pedal. Improvise with anything you can think of for 5 minutes just on this chord. You can play scales, arpeggios, come up with melodies, etc. You might be surprised at how much you can come up with.
If you ever want to write your own songs, improv is the ticket. For centuries, musicians have used this tool to come up with new ideas and craft songs.
Exercise 4: Sight-Reading
Sight-reading is another great warm-up exercise. It can significantly improve your hand-eye coordination. Find some simple sheet music from a book or the internet, and go with it. At first, you can look at the notes on the keyboard as you play. But, after a bit, try to read the sheet music without looking at the piano. It might seem daunting at first, but you may be surprised at how fast you can do it. Here are some tips for when you do sight-reading exercises:
- Go at a slow tempo
- Look at the music for a few minutes before playing it
- Look slightly ahead of where you’re at
If you do this exercise frequently, you’ll see huge improvements in your sight-reading abilities. Being able to sight-read well is one of the most desirable traits for pianists.
Piano Exercises to Improve
There are lots of highly-effective exercises for more advanced pianists as well. Even if you play at a higher level, there’s always room to improve with useful exercises.
Exercise 1: Running Through The Chords

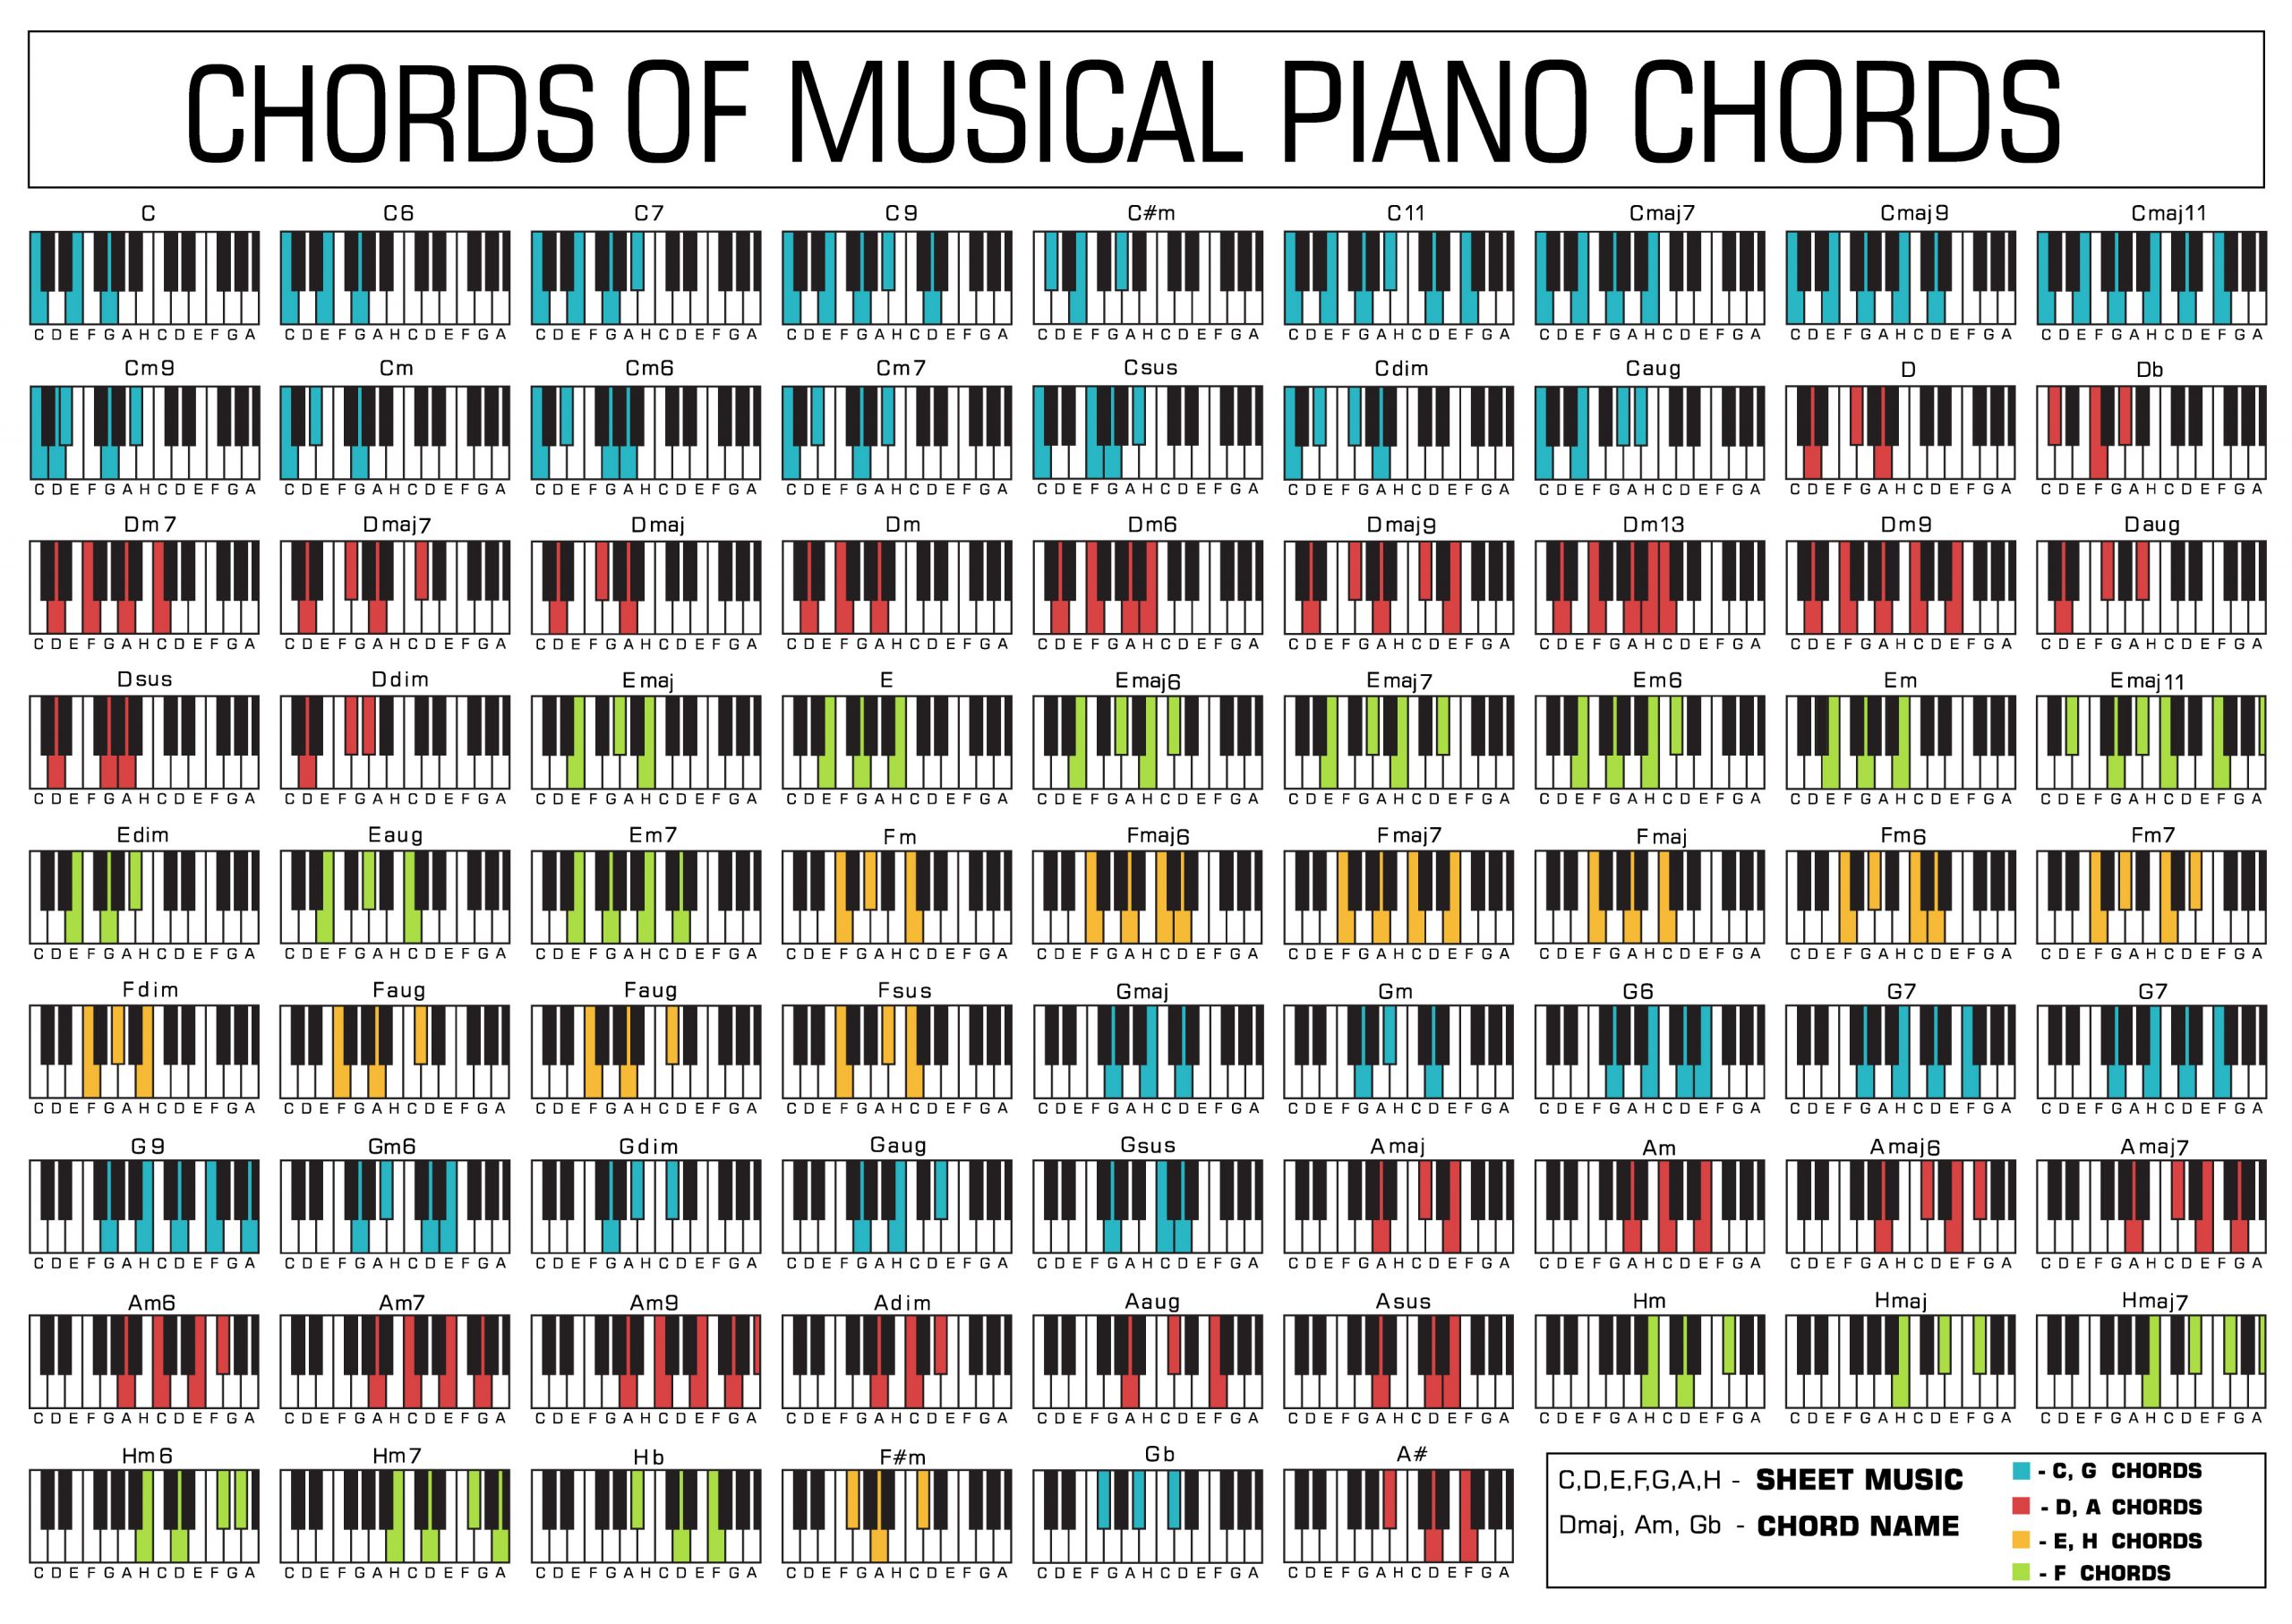
This exercise is one of the best things any pianist can do. It involves these 5 types of chords: major 7th, dominant 7th, minor 7th, half-diminished, and fully diminished. These 5 chord types account for most of the music we hear today. In this exercise, both hands play the same thing.
To start off, play a C major 7th chord in both hands (C, E, G, and B). Then, move up every inversion of this chord until you reach the original one again. At this point, you’ll go back down. Immediately after this, do the same thing with C dominant 7th. Then, minor 7th, half-diminished, and fully diminished.
And, finally, do the same thing in all 12 keys. If you’re an experienced pianist, it might even take several weeks to perfect this exercise. But, once you do, you won’t be disappointed. It improves your knowledge of chords and synchronizes your hands better.
Exercise 2: Arpeggios

You can never go wrong with some arpeggios. It’s almost like they were built for pianists. The piano has more octaves than most instruments, which means there’s more room for arpeggios. Start out by arpeggiating major chords up and down two octaves with both hands. As you do this exercise, it’s great to use a metronome as well. Treat the notes as 8th-note triplets, and it will perfectly align with the metronome. Minor chord arpeggios are beneficial, as well. Once you go through all the major and minor chords, you can experiment with 7ths, 9ths, and other chord types.
Exercise 3: Chromatic Scale

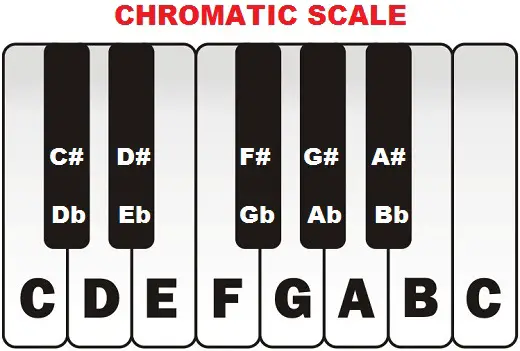
Running up and down the chromatic scale is an excellent exercise. Chromaticism is used in all kinds of pieces, and it can also be a nice tool in improvisation. Getting good at the chromatic scale is a milestone for pianists. Here are some tips for practicing the scale:
- Use only the 1st, 2nd, and 3rd fingers
- Play to a metronome
- Use both hands at the same time
- Gradually speed up until you can play it quickly
There are several different fingering techniques for the chromatic scale. However, the easiest fingering to start with is the 1-2-3 method. When playing the scale, your 3rd finger always plays the black keys. Starting on C, the first fingering option is 1, 3, 1, 3, 1, 2, 3. You can develop lots of speed with this fingering. The next option is 1, 2, 1, 2, 1, 2, 3. In terms of difficulty, both of these fingerings are about the same. Try out both versions and see with one feels more natural to you.
It’s great to play the chromatic scale with a metronome. When playing such a technical scale, it’s easy to develop bad habits. The metronome can break or prevent those habits.
When you practice this exercise, it’s better to use both hands instead of one. This will keep your hands from becoming imbalanced. Having a left hand that is as agile as the right opens up a world of possibilities. You could play songs with busier left-hand parts or improvise with both hands.
You can start at the tempo that works best for you. The more you do this exercise, the speedier your fingers will get. A benchmark to aim for is 16th-note chromatic notes at a tempo of 120. If you get this quick, you have some serious chops.
Exercise 4: Play a Song You Know
Sometimes, playing a song you know is the best exercise you can do. Rather than moving from exercise to exercise, you might benefit from just playing pre-learned material. This is one of the most satisfying methods. You can just sit back and enjoy the progress you’ve made with the instrument. Getting lost in various exercises without playing the music you enjoy can burn anyone out. That’s why it’s important to create a balance between new exercises and previously learned material.
Exercise 5: The Pentatonic Scale

If you know all your major scales, you can benefit a lot from pentatonic-scale exercises. The basic definition of a pentatonic scale is “any scale with 5 notes.” However, there are two main ones: major and minor. These scales basically utilize all the “butter notes.” In fact, major and minor pentatonic scales are the most singable scales. Many popular songs use it because it’s proven to get a positive response from listeners. Getting fluent with them can greatly increase your musicianship. Here’s an excellent pentatonic scale exercise:
- Play C major pentatonic up and down
- Play the scale in groupings of 3
- Play the scale in groupings of 4
- Practice playing them over different chords
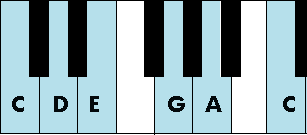
The C major pentatonic scale notes are C, D, E, G, and A. C minor pentatonic scale is C, Eb, F, G, and Bb. Play these scales up and down with your right hand a few times. When you’re comfortable with them, you can play it in groupings of 3. It sounds complex, but it’s not. Here are the notes to play in order in groupings of 3: C, D, E, D, E, G, E, G, A, etc. As you can see, once you play 3 notes, you restart the pattern on the second note. Do the same thing going down. This pattern is a great way to build your dexterity. It’s also something you can incorporate in your improvisations.
Groupings of 4 aren’t much different than 3. Here’s what it looks like in C major pentatonic: C, D, E, G, D, E, G, A,, E, G, A, C, etc. In this exercise, each note is a 16th note. Practice going up and down with a metronome until you can do it without thinking.
After doing some pentatonic exercises, it’s time to apply them. There are at least 3 different pentatonic scales you can use for every chord you play, which is very cool. For the chord F major 7th, you can use D minor pentatonic, A minor pentatonic and E minor pentatonic. Each of these scales uses different notes within the realm of F major. A good way to remember which pentatonic scales to use on major chords is to think 3rd, 6th, and 7th. Relative to the root, these are the intervals to start the minor pentatonic scale from.
For the exercise, play a major 7th chord of your choice and experiment with the 3 pentatonic scales. Play the scale and group it into 3 and 4 notes. If you do this, your understanding of music theory and scales will increase dramatically.
Top 5 Piano Exercises for Beginners
Conclusion
Exercises are the bread and butter for all pianists to improve. They can be as easy or as hard as you want them to be. It’s essential to understand the purpose of each exercise rather than just reading the ink. Without understanding them, it’s hard to apply them in real music.
Picking and learning the right ones can take your piano skills to the next level. The exercises I showed in this article are some of the best ones I’ve come across through research, experts, and personal experience. So, what are you waiting for? Go practice some of these exercises and take your skills to new heights!
